The Essential Embroidery Supply Checklist for Beginners
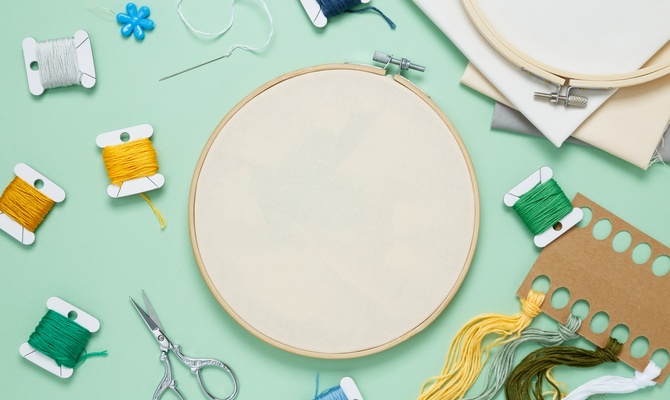
Starting embroidery feels easier when every tool has a clear purpose. A thoughtful kit helps you form clean stitches and protect your fabric without buying supplies you may never use. This guide presents the essential embroidery supply checklist for beginners, so you can assemble a dependable starter setup with confidence.
You do not need a crowded craft room or expensive equipment. You simply need reliable basics that suit your first project and feel comfortable in your hands. Preparation makes early practice calmer and more productive. Once those essentials are ready, you can focus on the quiet satisfaction of watching a design take shape.
Begin With a Comfortable Embroidery Hoop
An embroidery hoop keeps fabric evenly tensioned while you stitch. For most first projects, a round wooden or plastic hoop between five and seven inches offers a manageable working area. Choose one that closes firmly and has a screw you can tighten without strain. Smooth wooden hoops feel light and traditional, while plastic hoops often grip slippery material more securely.
Test the hoop before buying it when possible. The inner ring should fit snugly inside the outer ring, without obvious gaps or warped sections. Run your fingers along every edge to check for splinters or rough spots that could catch the fabric. If you choose wood, lightly sanding an imperfect edge can prevent damage.
Select Fabric That Welcomes Practice
Even-weave, medium-weight fabric gives new stitchers a forgiving foundation. Cotton and linen blends work especially well because their visible weave makes needle placement easier. Avoid very stretchy knits or heavy upholstery fabric for your first attempt. Loose gauze also demands specialized handling before you have built basic control.
Choose a light, solid color if your pattern uses a transfer method. Pale fabric makes drawn lines easier to see and lets bright thread stand out. Before stitching, wash the fabric according to its care instructions, then press it flat. Prewashing removes finishes and reduces the chance of later shrinkage.
Match Needles To Thread and Fabric
Embroidery needles have sharp points and elongated eyes that accommodate stranded floss. A small assorted pack lets you test several sizes without committing to a large quantity. The needle should pass through the fabric without forcing a wide hole, while its eye should hold the chosen thread without abrasion.
Use a larger needle when working with more strands or heavier thread. Switch to a smaller one for delicate lines. If the thread frays near the eye, the needle may be too narrow or damaged. Replace bent or blunt needles promptly because they can harm fabric and make each stitch harder.
Build a Useful Thread Palette
Six-strand cotton embroidery floss remains an approachable choice for hand embroidery. You can separate its strands to change line weight, which makes one skein remarkably versatile. Start with the colors required by a chosen pattern instead of buying a huge assortment. Project-based shopping controls costs and prevents unused shades from tangling in storage.
Cut a practical working length, usually from fingertip to elbow. Longer pieces may seem efficient, but they twist and wear as they repeatedly pass through fabric. Separate strands individually, then recombine the number your design requires. This method reduces knots and helps the floss lie smoothly.
Choose Stabilizer With a Clear Purpose
Stabilizer supports fabric during stitching and helps prevent puckering or distortion. Choosing the right stabilizer for every fabric type begins with the project’s weight and structure. Its final use matters too. A lightweight tear-away option can support stable woven cotton, while a cut-away product gives lasting reinforcement to fabric that stretches. Water-soluble stabilizer works well when you want temporary support or a printable pattern layer that disappears after rinsing.
Always read the product instructions before applying heat or water. Test a small scrap of fabric first to confirm that removal will not leave residue or discoloration. Cut the stabilizer slightly larger than the design area and keep it smooth inside the hoop. The right support should improve control without making the fabric unpleasantly stiff.
Add Sharp Scissors and Marking Tools
Small embroidery scissors make clean thread cuts close to the fabric. Look for sharp, fine tips and handles that feel steady in your dominant hand. Reserve these scissors for thread so paper and household materials do not dull the blades. Store them closed or inside a protective sheath.
A dependable marking tool transfers your pattern accurately. Water-soluble pens suit many washable fabrics, while removable chalk works better on dark surfaces. Heat-erasable pens can be convenient, but their lines may reappear in cold conditions or leave faint shadows. Whatever tool you choose, test it on a scrap before marking the project.
Organize Supplies for Easier Stitching
Simple storage protects tools and makes short stitching sessions more inviting. Use a lidded box or zippered pouch that fits your current collection. Separate sharp objects from loose floss and keep marking tools capped. A portable setup lets you move the project safely without crushing the fabric or losing small items.
Place each thread color in its own compartment or labeled sleeve. Return tools to the same location after every session. This habit reduces tangles and shows when needles or transfer supplies need replenishing. Keep the active pattern with the project so color keys and stitch directions remain available.
Buy for a Project, Then Expand Thoughtfully
A starter kit can offer convenience, but you should inspect its contents before purchasing. Some kits include weak thread or dull needles. Others provide fabric that fights every stitch. A kit tied to one clear pattern often provides better value because each item serves an immediate purpose. Check whether it includes a hoop, enough floss, suitable fabric, a needle, and transfer instructions.
Buying individual supplies gives you greater control over comfort and quality. Begin with one appealing pattern that uses familiar stitches and a modest color palette. Finish it before adding specialty threads or elaborate frames. Wait to buy multiple hoop sizes. Your preferences will become clearer through actual stitching.
Your Beginner Embroidery Kit Is Ready
With the essential embroidery supply checklist for beginners complete, you can approach your first design with preparation instead of guesswork. Gather a comfortable hoop, cooperative fabric, suitable needles, quality floss, appropriate stabilizer, precise scissors, and a tested marking tool. Add safe storage as your project requires. Keep the collection focused and care for each item. Let experience guide future purchases.
Embroidery rewards patience more than equipment. When your tools support the fabric and feel natural to use, every stitch becomes easier to place. Choose a simple pattern and thread your needle. Then begin creating something distinctly your own.